Skip to Main Content
Back to Navigation

How to Install a Barn Door

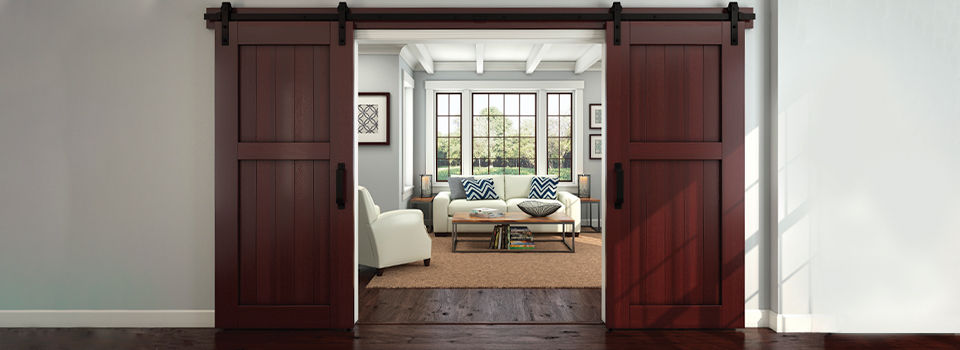
Brown wooden sliding barn doors in a traditional style of house

Interior barn-style sliding doors have become a favorite DIY project of homeowners seeking a unique way to separate rooms and spaces in their homes. The concept of a sliding barn door is extremely versatile; doors are available in rustic or modern styles (or a mix of both), making them perfect for any interior décor.

A basic sliding barn door setup requires a hardware kit and, obviously, a door. If you’re ready to get started, here’s how to install a barn door and why it’s an excellent choice for many different homes.

Benefits of Interior Barn Doors

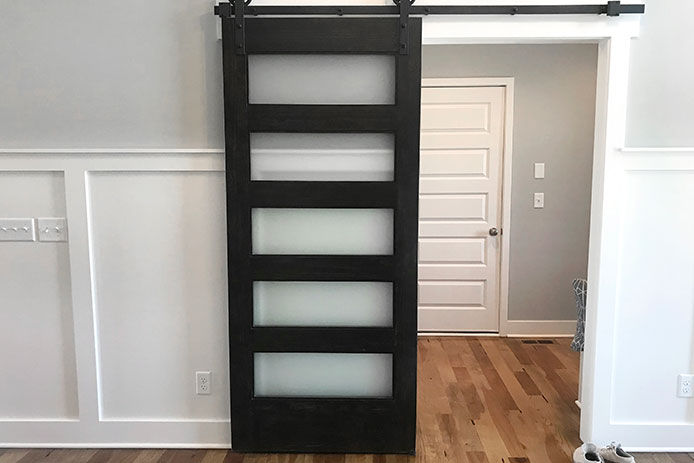
A new modern style of barn doors with frosted glasses panels

The benefits of updating your home with a sliding barn door are numerous, but the biggest advantage is the way that barn doors can help you save on space.

A sliding barn door is a great solution if you have a layout without enough space for opening and closing a traditional hinged door. Conventional doors require room to swing, whereas sliding doors are ideal for smaller areas like bathrooms and hallways. The doors offer privacy and help you divide your floor plan easily.

One reason sliding barn-style doors have become popular is the functionality. Most barn doors are lightweight and easy to open. They’re perfect for families with small kids and busy parents. Are your hands full? No problem! Most barn doors slide with a nudge of your foot or elbow with smooth operation.

Do you think barn doors might not suit your style? You may be surprised to discover that barn doors aren’t limited to just rustic and industrial design styles. Many doors offer sleek, modern looks, and today’s sliding barn doors are unique and customizable to match nearly any aesthetic.

Installing Barn Doors in Your House

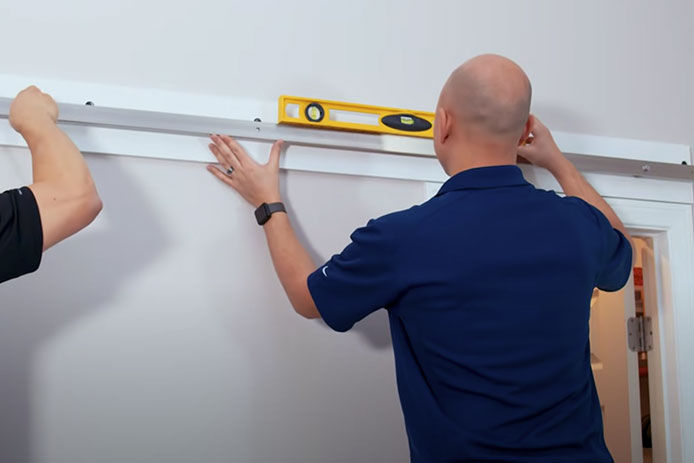
Two people measuring and using a level to install the track of a barn door kit

Installing a barn door might seem like an intimidating project, but it’s much easier than installing a conventional door. There are no worries about getting the door flush with a crooked door frame (especially in older homes). A barn door works with all sorts of openings and setups.

Conventional doors often require careful alignment, not to mention the hassle of installing hardware like hinges and knobs and ensuring they are all lined up. A door must be plumb or it will stick. In some cases, if there’s too much space, the door won’t stay closed.

Installation of conventional doors is difficult and time-consuming. Doors need to be measured closely and may still not hang right. Sliding barn doors, however, are chic, simple, and a breeze to install. Even novice DIY-ers can tackle a sliding barn door installation with precut hardware and a barn door kit.

What’s more, barn doors are easy to change out. If your décor changes from farmhouse cottage to beachy coastal, you can easily switch the sliding barn door to match. Because the door slides across the doorway, an exact fit isn’t a problem.

Barn Door Installation

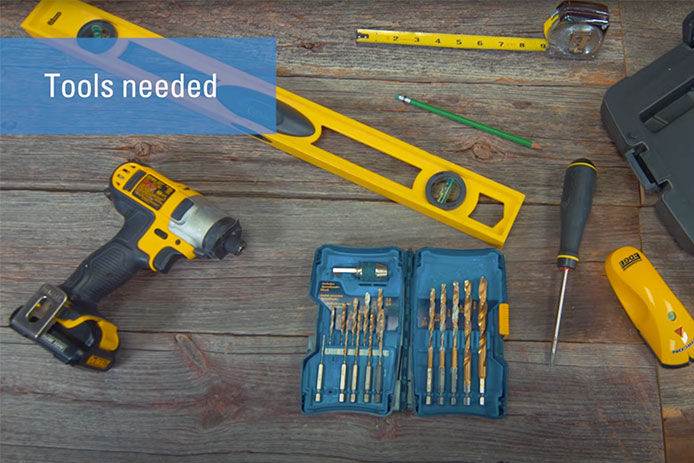
An image of power tools and hand tools needed to install a sliding barn door in your home

If you’re ready to tackle your sliding barn door installation, follow the steps below for an easy DIY project. If you prefer video guidance, don’t miss this YouTube tutorial that explains the barn door installation process step-by-step. Refer to the installation manual included with your kit for any questions.

Tools Needed to Install a Sliding Barn Door

1. Measure the Door Opening

To start installing a sliding barn door, you’ll first need to measure the door. Measure the height and width of the door opening. If your door has a frame, you’ll want to measure both the inside and outside parts of the frame. Ensure your sliding door is the right size. The sliding door should sit about two inches beyond the door opening on either side. You’ll also want to ensure that there are no obstructions on either side, like switch plates, so you can open the door fully. 

2. Install the Header Board

If you are unsure of the space, use a stud finder to locate the wall studs on either side of the door opening—this is where you’ll want to install the header board to ensure that it’s secure. The header board should be the same length as the track. You’ll need to use a level to hang the header board straight. It helps to mark the wall with a pencil, so you are sure it’s exactly as you want it. Secure the header board into the wall studs using a drill and wood screws. You may want to fill and paint over the screws for a seamless look.

3. Install the Track

The next step is installing the track. Do not install the track directly into the drywall. You must install the track on the header board. You’ll need to center the track on the header board. Mark the non-slotted hole on one end of the track. Drill the screw holes and use the fasteners in the kit to secure it. Keep the track level and repeat the process on the other end of the track.

If you are using a single floor guide, you will need to prepare the door in step 3. Mortise a groove along the bottom of the door using a router. If you are using a double floor guide, you will not need to install a groove.

4. Install Sliding Door Hangers

Use the template included in your sliding barn door kit. Align the template with the front and top edges of the door. Mark the holes and repeat on the other end of the door. Measure to ensure that the distance from the door edge is the same on both sides. Using a drill, drill the screw holes into the door. Use the appropriate length screws for your door and affix the fasteners and hangers.

5. Install Anti-Jump Discs

Center the anti-jump discs along the top edge of the door, 2” from the inside edge of the door hanger. The hole should be closest to the front of the door. Repeat on the opposite end of the door.

6. Secure the Barn Door onto the Track

From there, it’s a matter of installing the sliding barn door onto the track. Test to see that the door opens evenly and smoothly. Use your level to check the door.

7. Install Doorstops

Slide the barn door closed, then slide the door stop onto the track against the hanger. Tighten the screws to secure the doorstop in place. Slide the door open and install the second door stop, repeating the process.

In addition to their powerful visual appeal, sliding barn doors are easy to install. The doors are amazingly versatile in color, size, and style. Sliding barn doors are an effective way to partition off two larger rooms and are an ideal feature for suggesting special separation.

Hanging a decorative interior sliding door is easy with a National Hardware sliding door kit. Follow the instructions in the kit to DIY a sliding barn door anywhere in your home. Interior sliding doors help you save space and create custom looks in almost any home.
How to Maintain a Sliding Barn Door?

Maintaining the beauty of your sliding barn door is simple. The doors require very little maintenance and once installed, need very little upkeep.

We recommend cleaning the barn door handle and hardware regularly. Not only does this help keep the touchpoints in your home clean and germ-free, but it will also help the hardware last for the life of your door. You can clean the hardware with a simple microfiber cloth.

Keeping the door and track dusted regularly will also help ensure that it opens smoothly and continues to look beautiful for years. You can use a wood-friendly dusting product or, again, a microfiber cloth to keep the door dust-free.

We suggest occasionally lubricating the bearings, particularly if you feel that the door isn’t sliding as easily or silently as it was when first installed. Graphite or a simple lubricating oil can keep the door sliding along the track smoothly and quietly.

beautiful sliding barn door from Do it Best is the perfect choice for any home. Create the look you love with a DIY sliding barn door kit today!


While do-it-yourself projects can be fun and fulfilling, there is always a potential for personal injury or property damage. We strongly suggest that any project beyond your abilities be left to licensed professionals such as electricians, plumbers, and carpenters. Any action you take upon the information on this website is strictly at your own risk, and we assume no responsibility or liability for the contents of this article.

test

6 Ways to Update Old Interior Doors

Easy DIY projects to refresh your home and make your old doors look new

Learn more
test

Chamberlain Buying Guide

Everything you need to know before you buy the perfect garage door opener

Learn more
test

Garage Door Maintenance to Keep It in Tip-top Shape

Six easy and cost-effective ways to keep your garage safe and prevent damage

Learn more
test

4 Easy Ways to Seal Drafty Windows

Budget-friendly tips for keeping your house warm and your electric bill low

Learn more
test

How to Prep and Install an Unfinished Screen Door

Learn how to easily add some flair to your door and hang it with a few simple steps

Learn more